Redback Racing
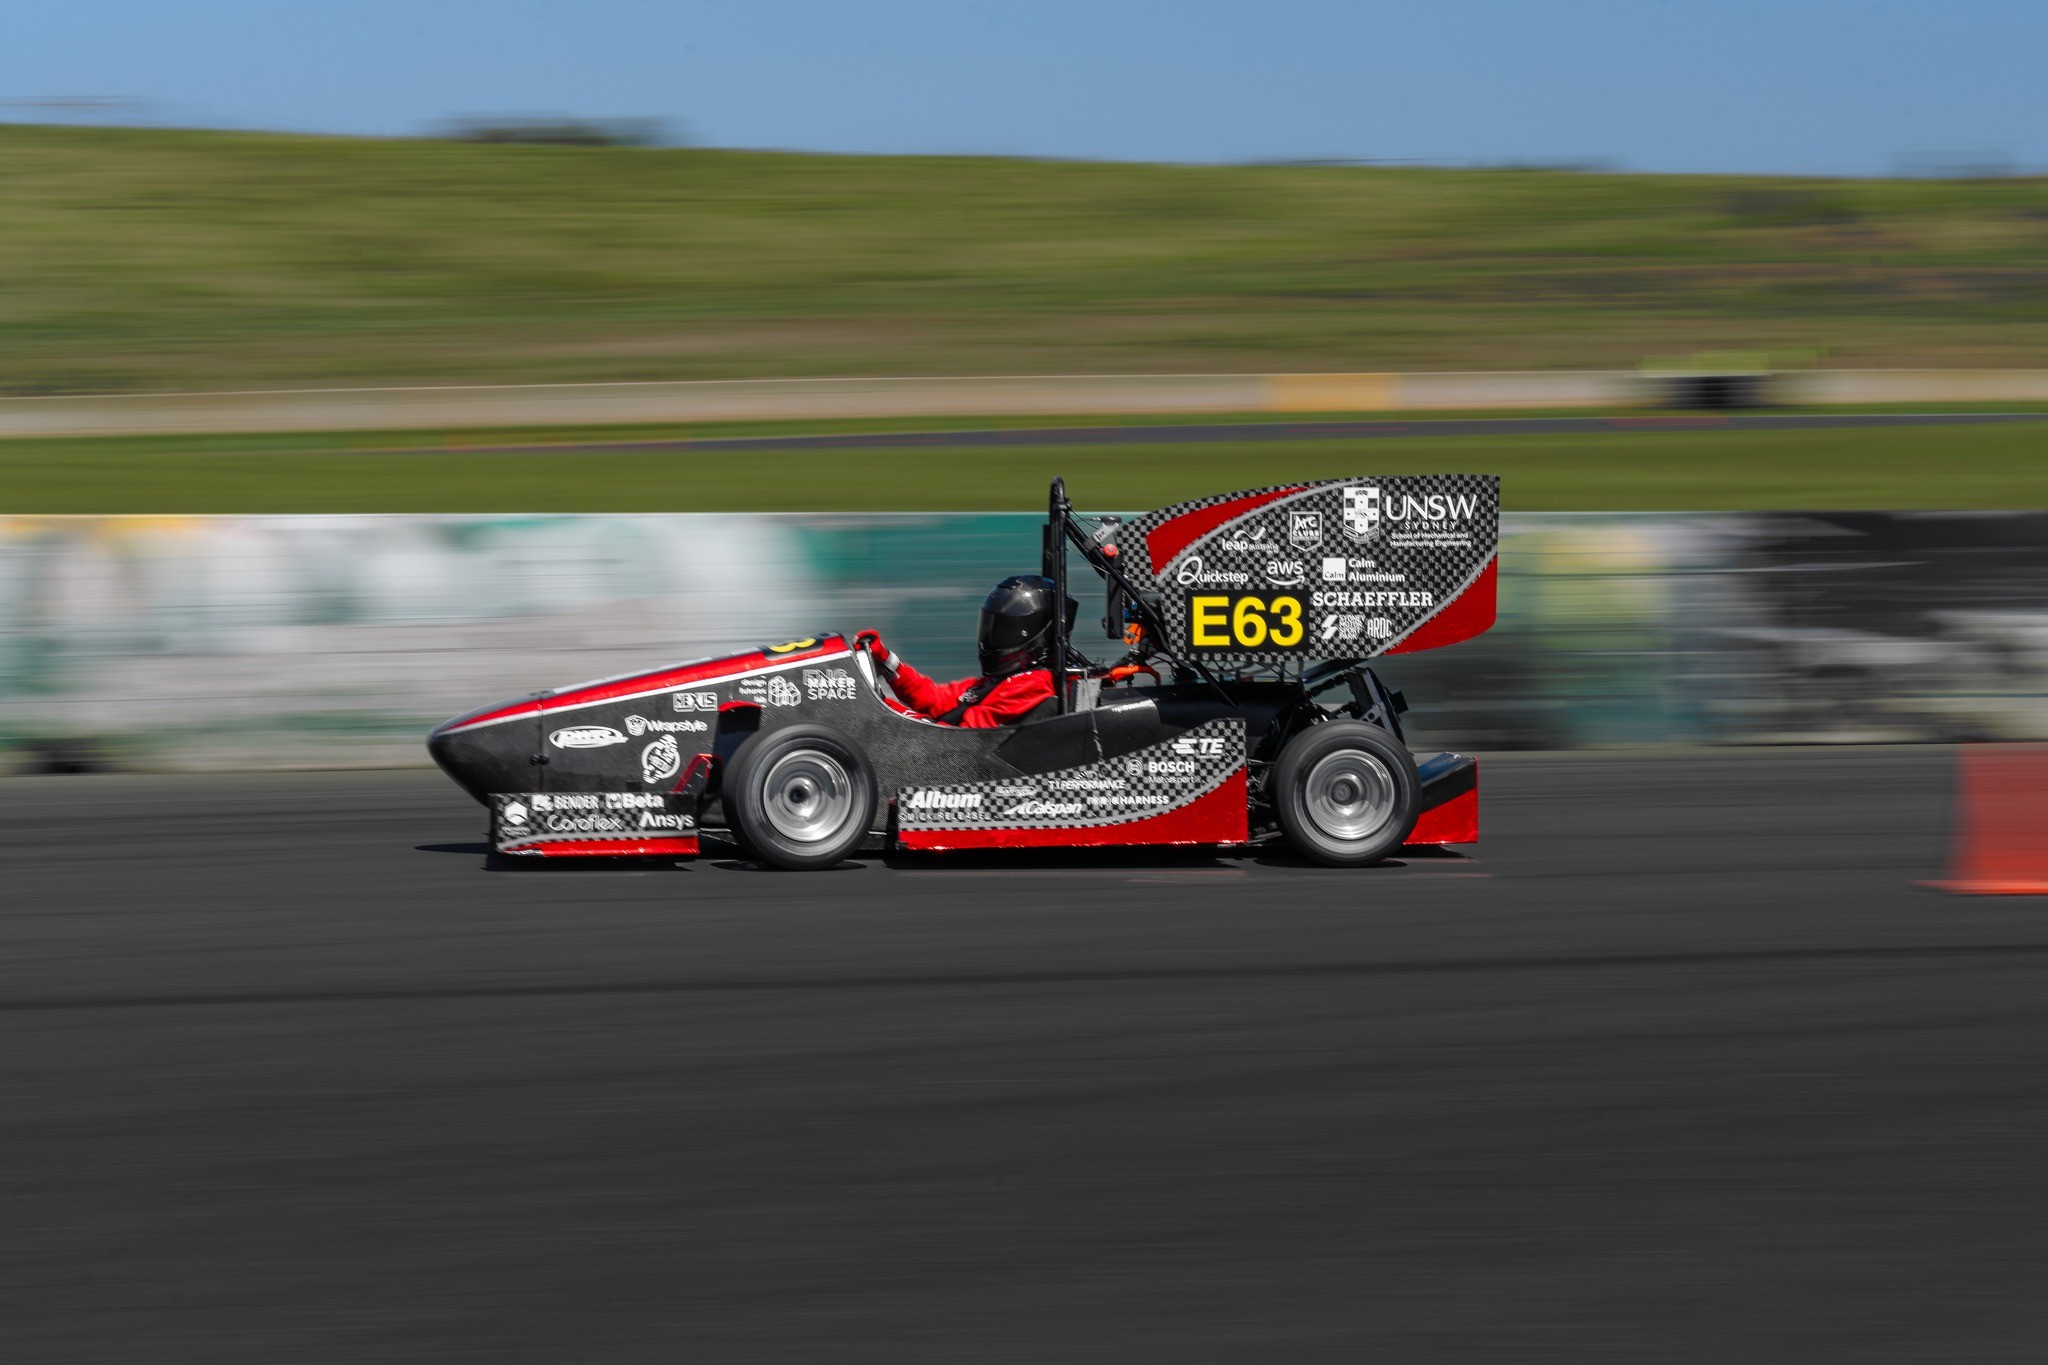
We build an F1-style car every year!
Redback racing is UNSW's formula SAE team, which I joined for two years. We build a Formula 1 style electric race car each year and compete with other universities. I joined the powertrain department and spent one year working on the electrical enclosure and high voltage battery. During my second year I became the lead of the powertrain department and was in charge of the HV battery, electric motor, safety and control system, and drivetrain.
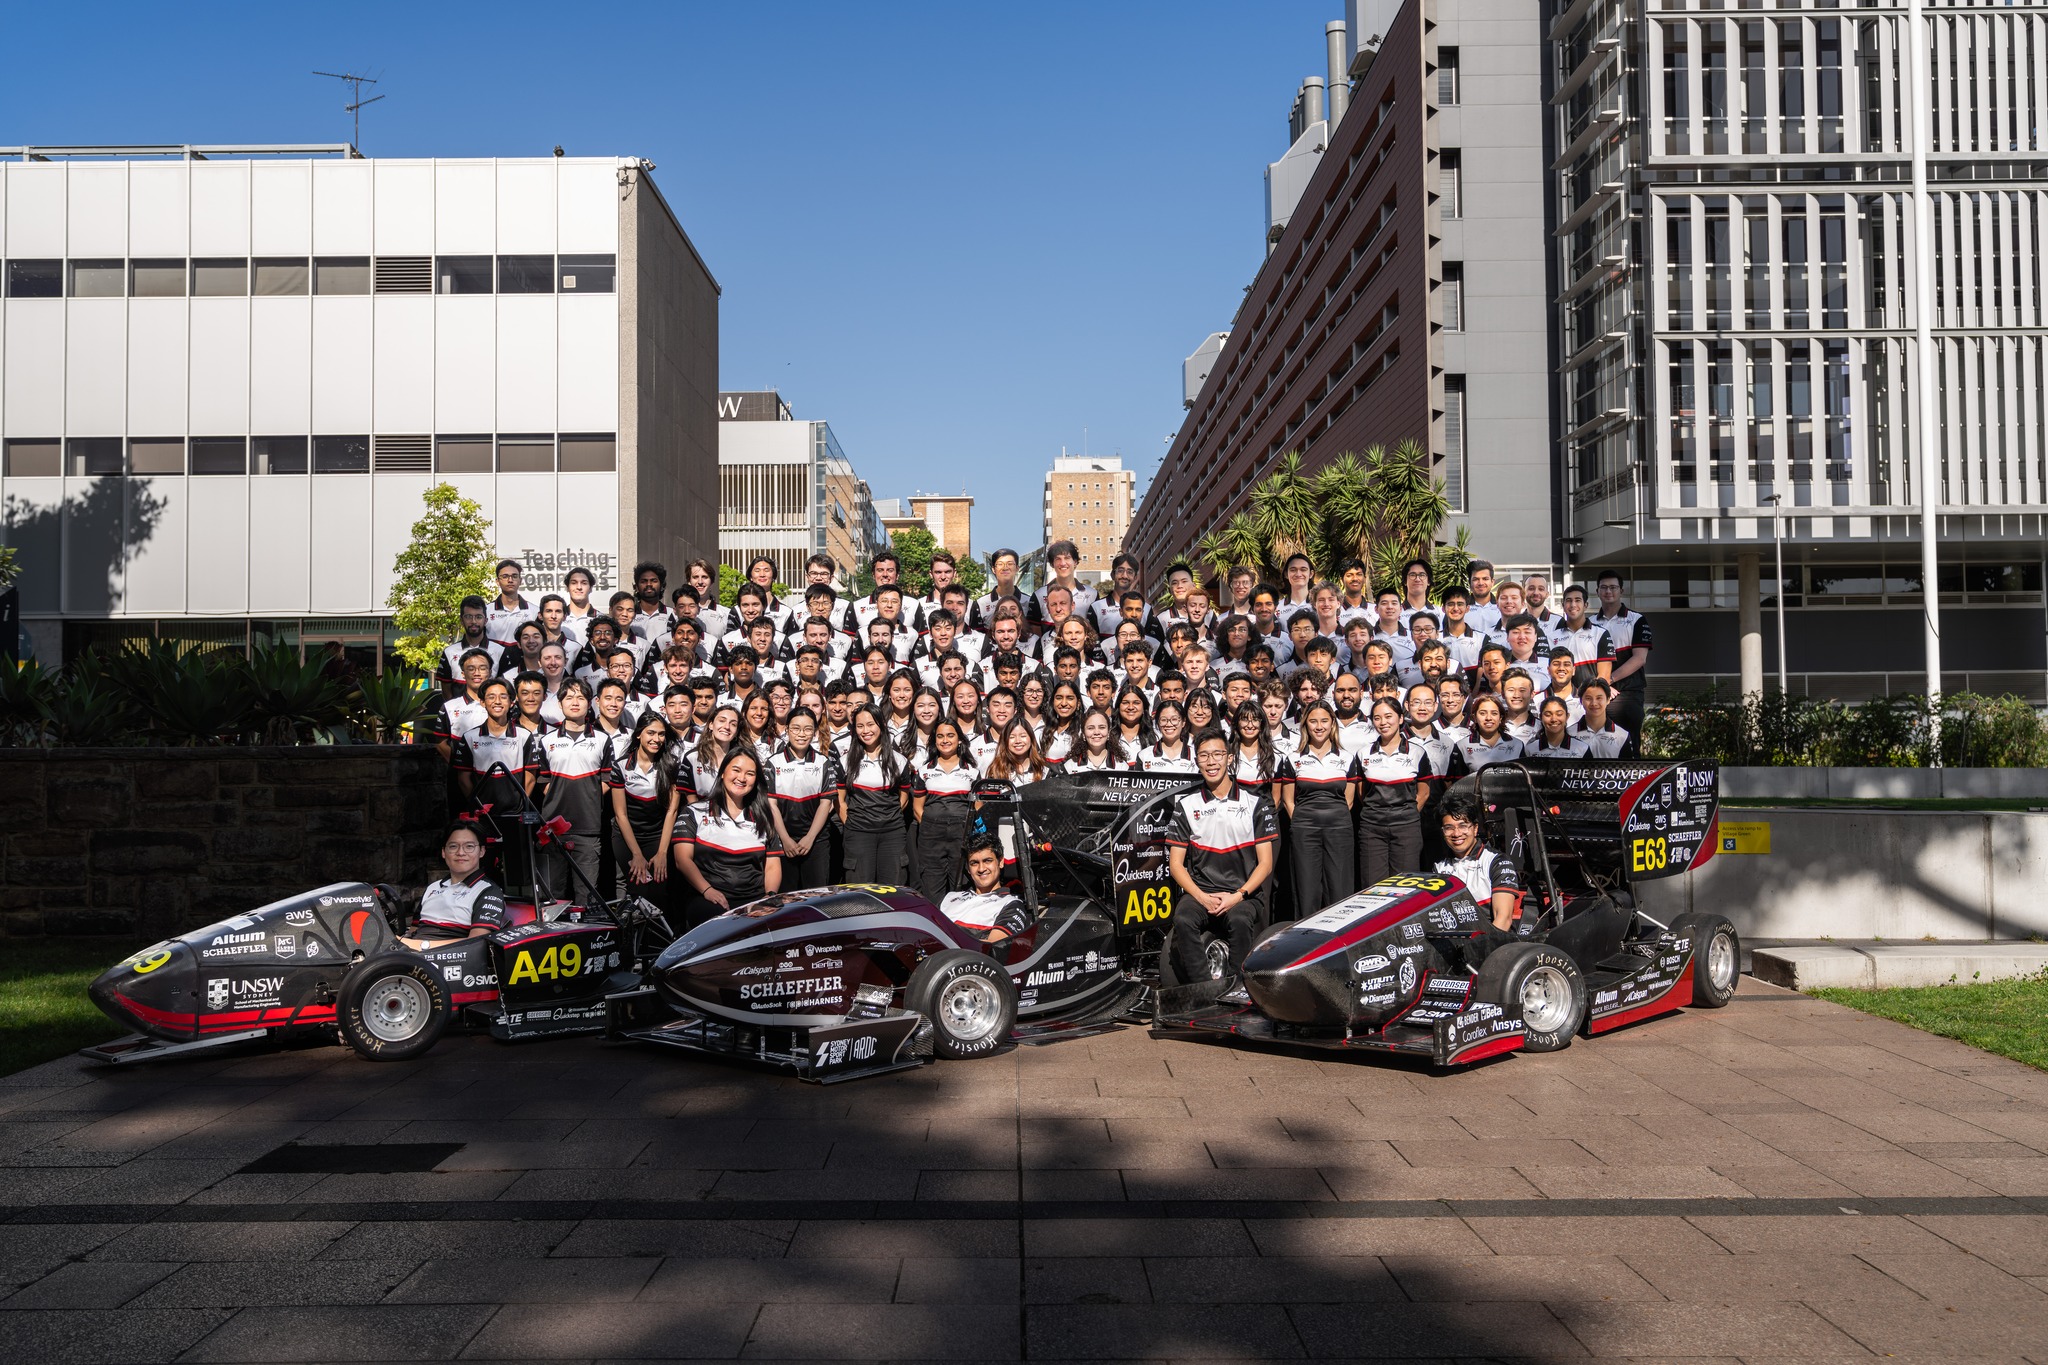
I think that student projects like Redback are an excellent opportunity, and you should get involved if you are at university. It felt like the first time I really got to apply things I was learning from my classes and it made the lessons more meaningful. I also learnt so many extra skills that you can’t teach in the classroom. Practical skills like design, manufacture, assembly and testing. Also, soft skills like working between departments, managing a team, and maintaining a professional workplace. I really enjoyed getting to work with so many keen, dedicated people who all wanted to build the best car possible. You can check out Redback’s website here.
Competition
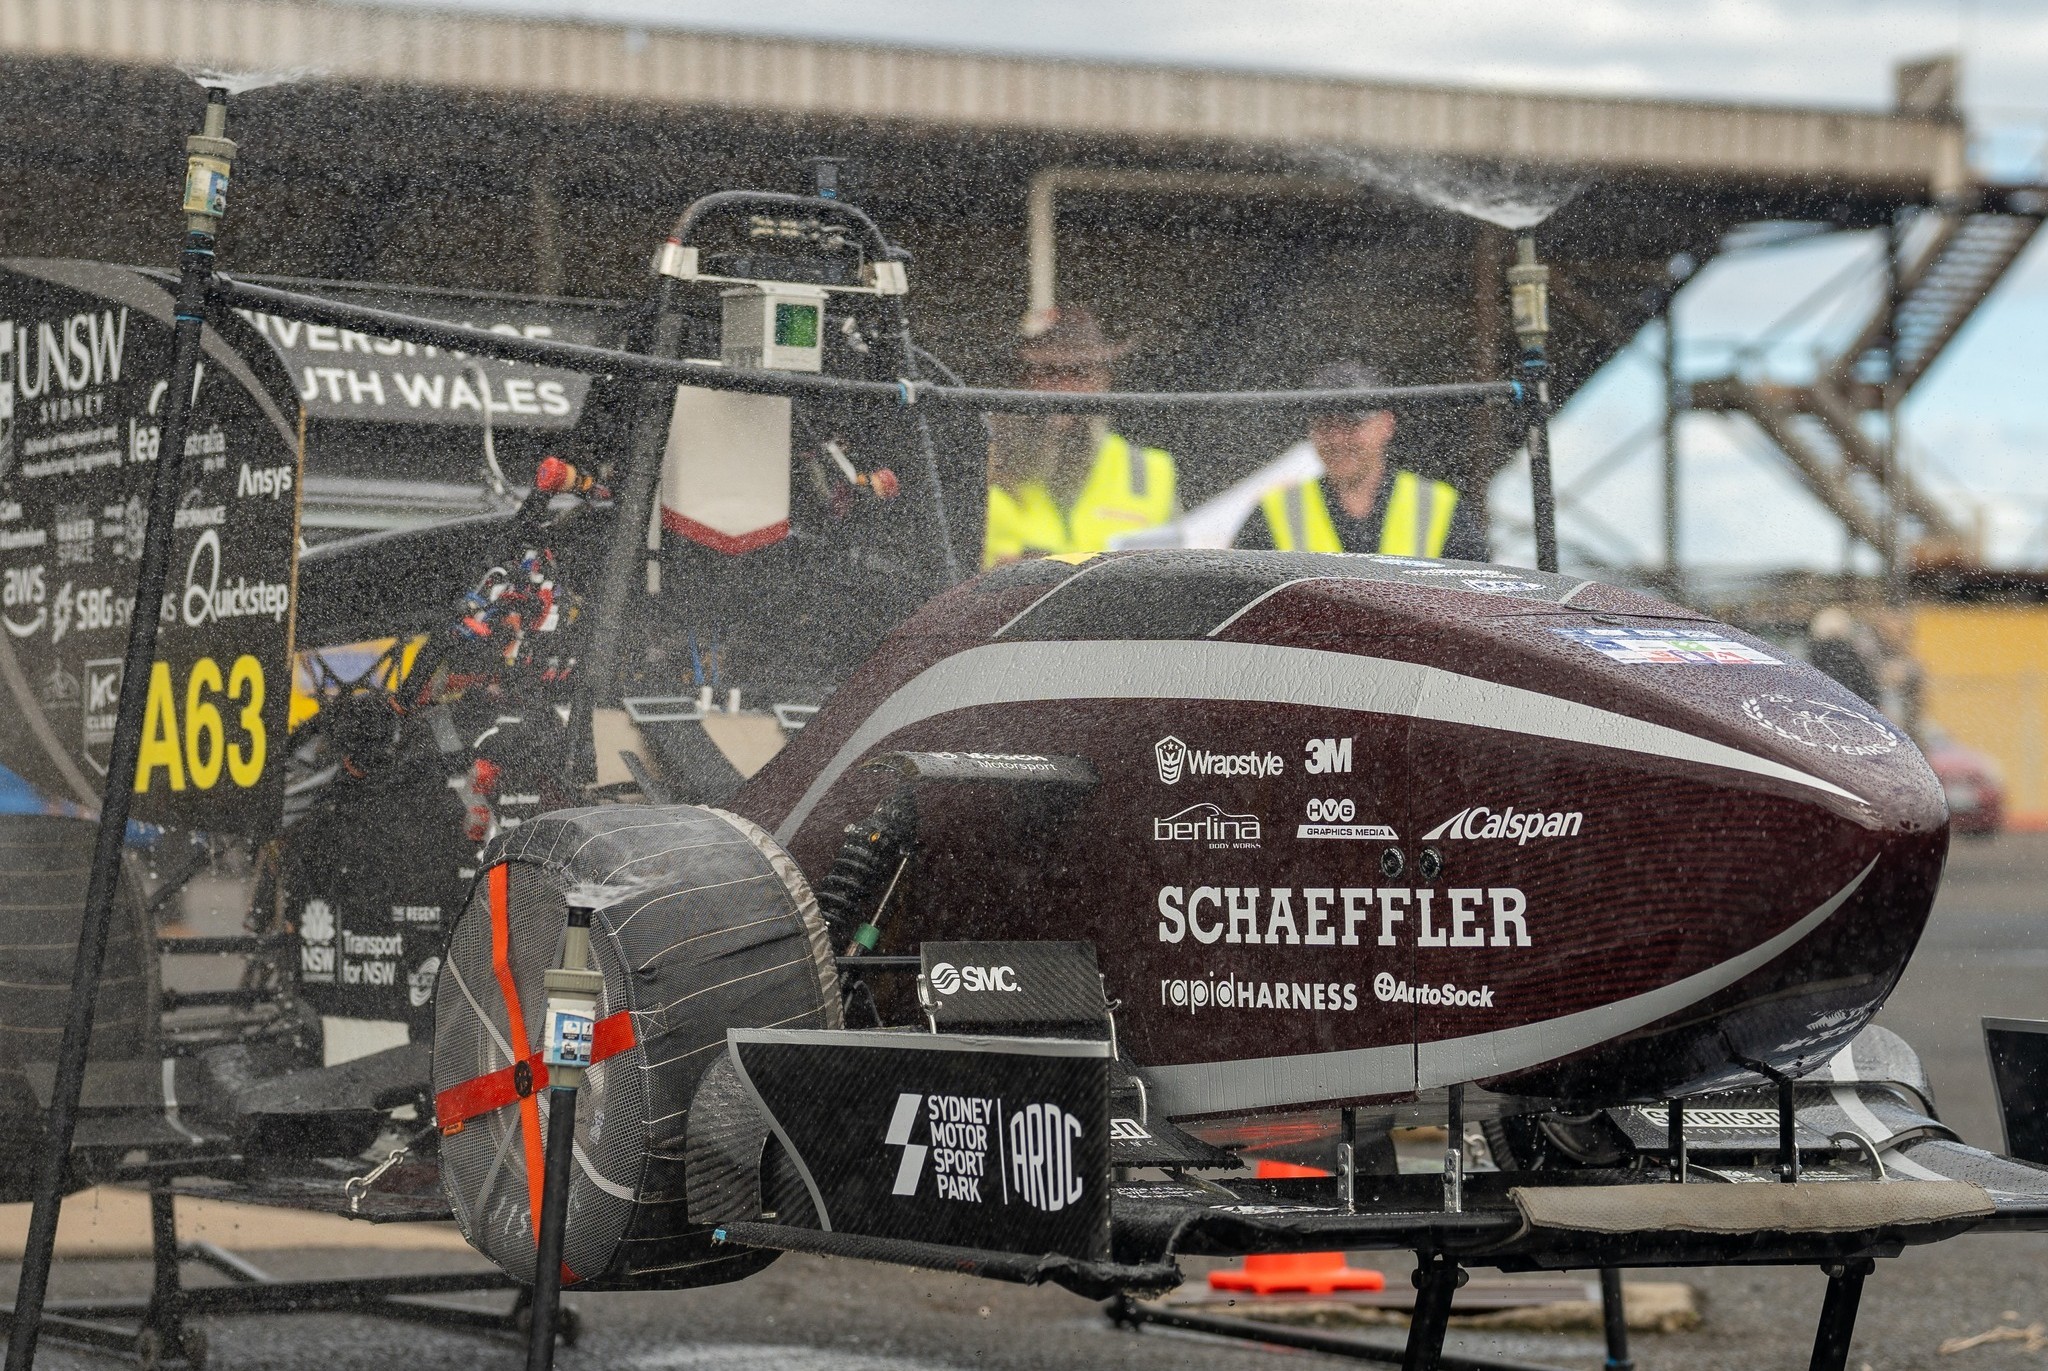
The cars compete in various events starting with the rain test. The car gets turned on and sprayed with sprinklers for a few minutes then left for another 5 minutes. This tests whether the water causes a short circuit from HV to the car which would cause the car to shut down due to the safety circuitry.
The cars must also complete autocross, which consists of four tight circles in two directions to test the cars turning acceleration.
The cars do a straight line acceleration test, which favors light and powerful cars. For this test we can change the shape of the rear wing to reduce drag.
The biggest challenge is Endurance where the car must complete a 22km race. They get marked for speed and energy efficiency.
HV Battery
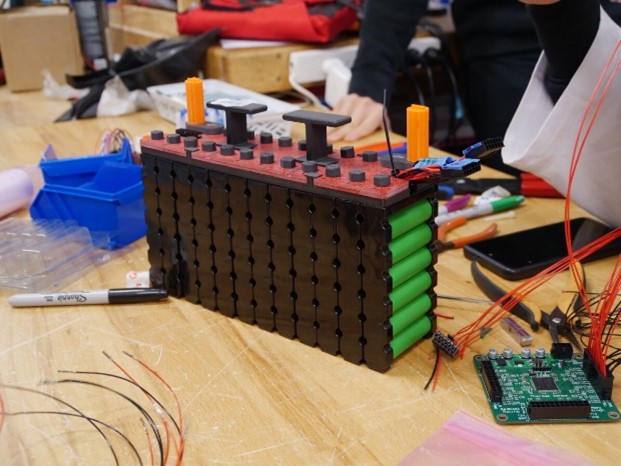
Our 600V battery was made of 12 segments in series, each with 12 modules in series. Each module contains six 18650 cells in parallel packaged with thermal monitoring, voltage taps, and insulative plastic caps. To make each segment, we used fiberglass boards to physically connect the modules and insulate between copper bus bars going from module to module.

Each segment was housed in a separate compartment in the battery, with aluminium walls and an insulative mica coating. The segments all have voltage tap wires and thermal sense wires that get routed to separate PCBs to measure module health. The battery management system (BMS) uses voltage and temperature information to control charging, discharging and balancing of the battery. If it gets too hot the BMS will reduce the maximum current draw to help maintain safe temperatures.
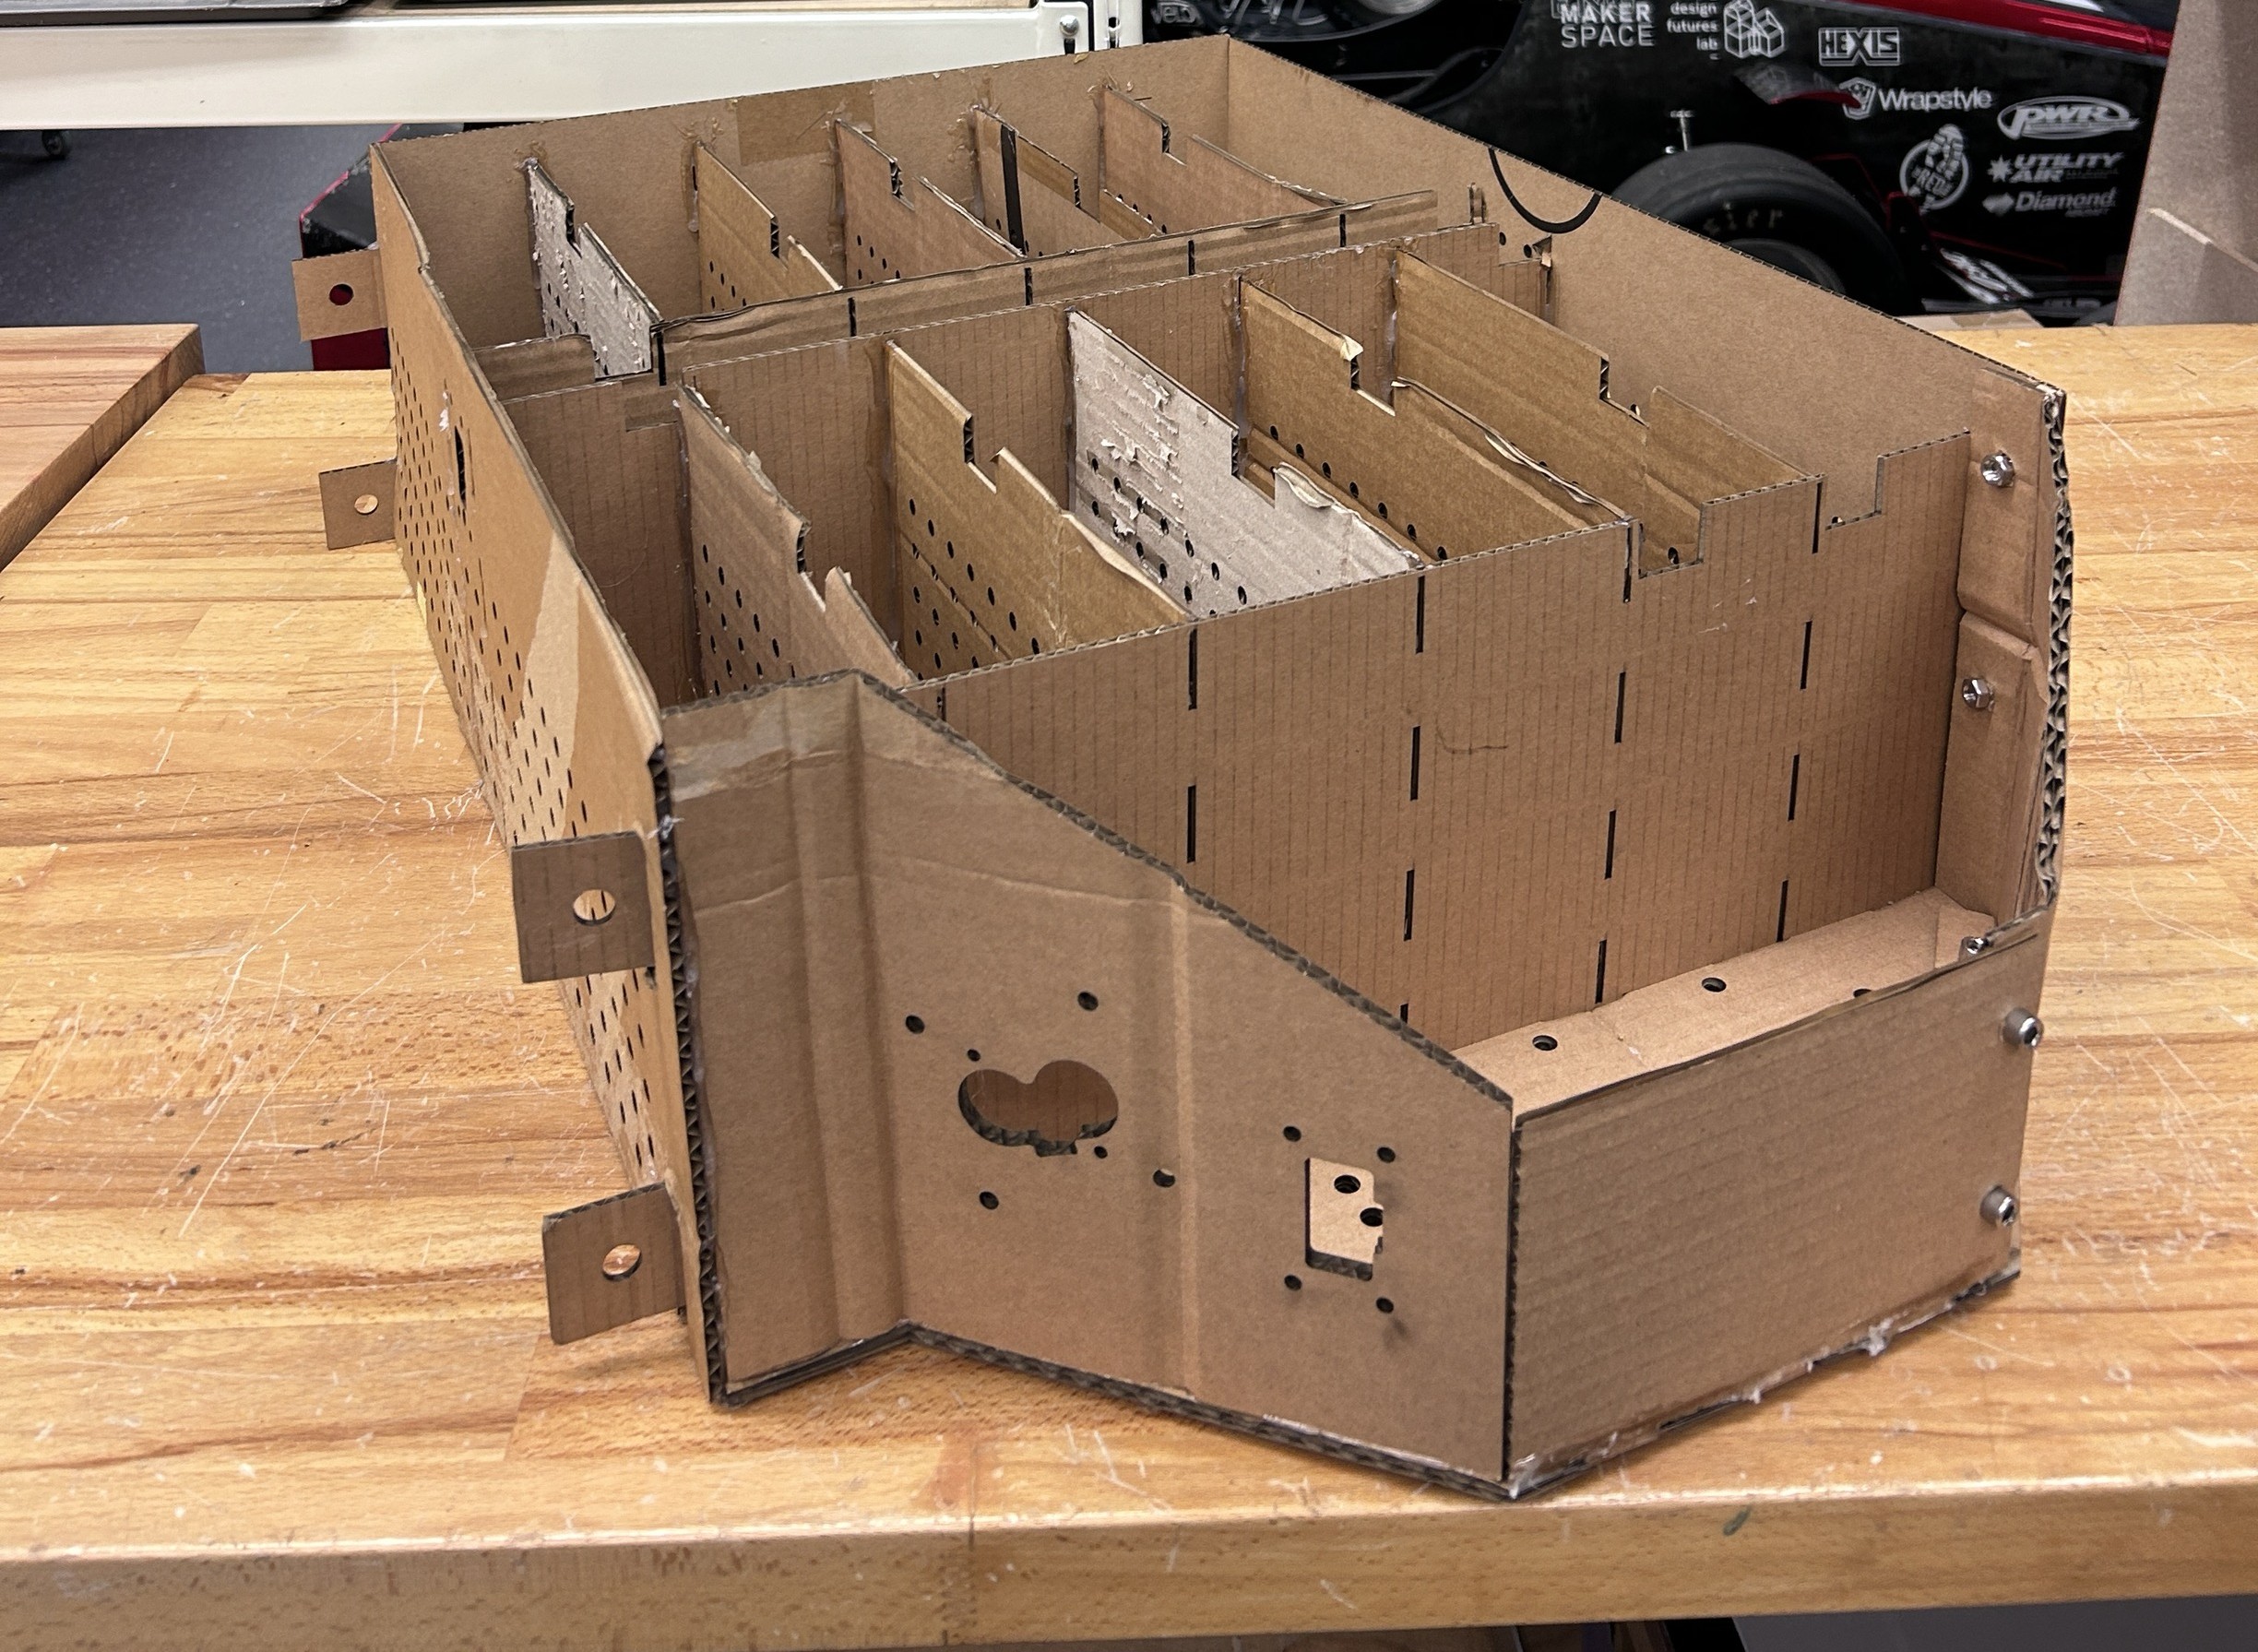
As with most engineering projects we first modeled our designs in CAD (cardboard aided design!) which is helpful to detect assembly and tool access issues.
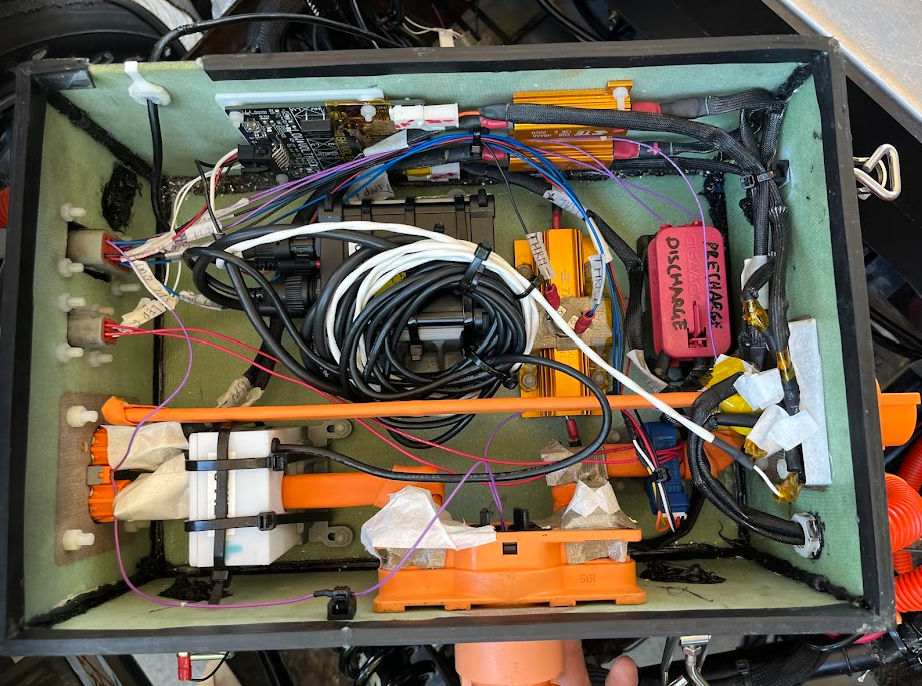
Electrical enclosure
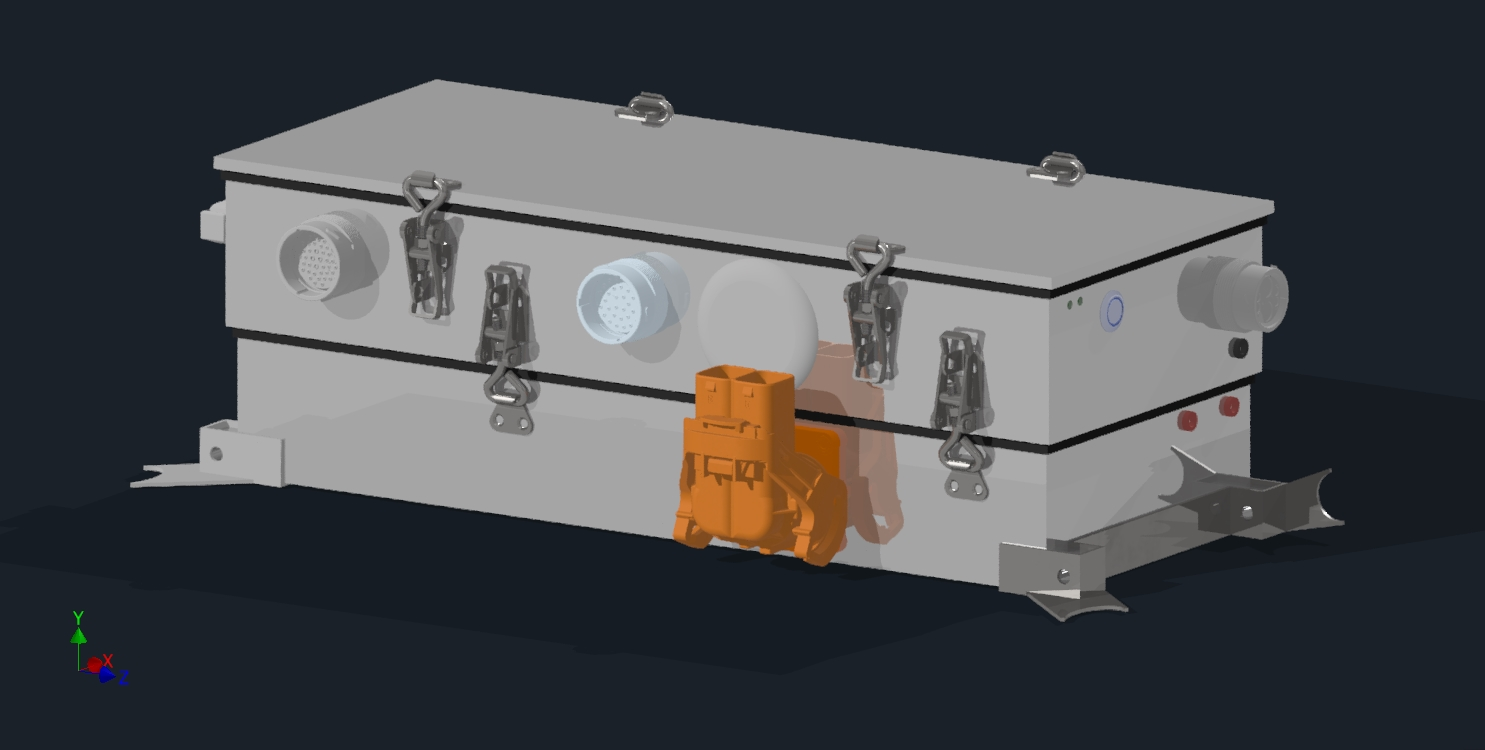
The electrical enclosure housed the high voltage and low voltage control and safety systems. The main concerns were easy access, waterproofing, electrical insulation, and physical integration with the other systems on the car. I designed the two boxes to be laser cut, bent and welded. I also designed steel mounts that welded onto the car chassis tubes. For quick disassembly the boxes were attached to each other with toggle latches. The toggle latches also provided downwards pressure onto the rubber U channel around the top of each box to create a waterproof seal.
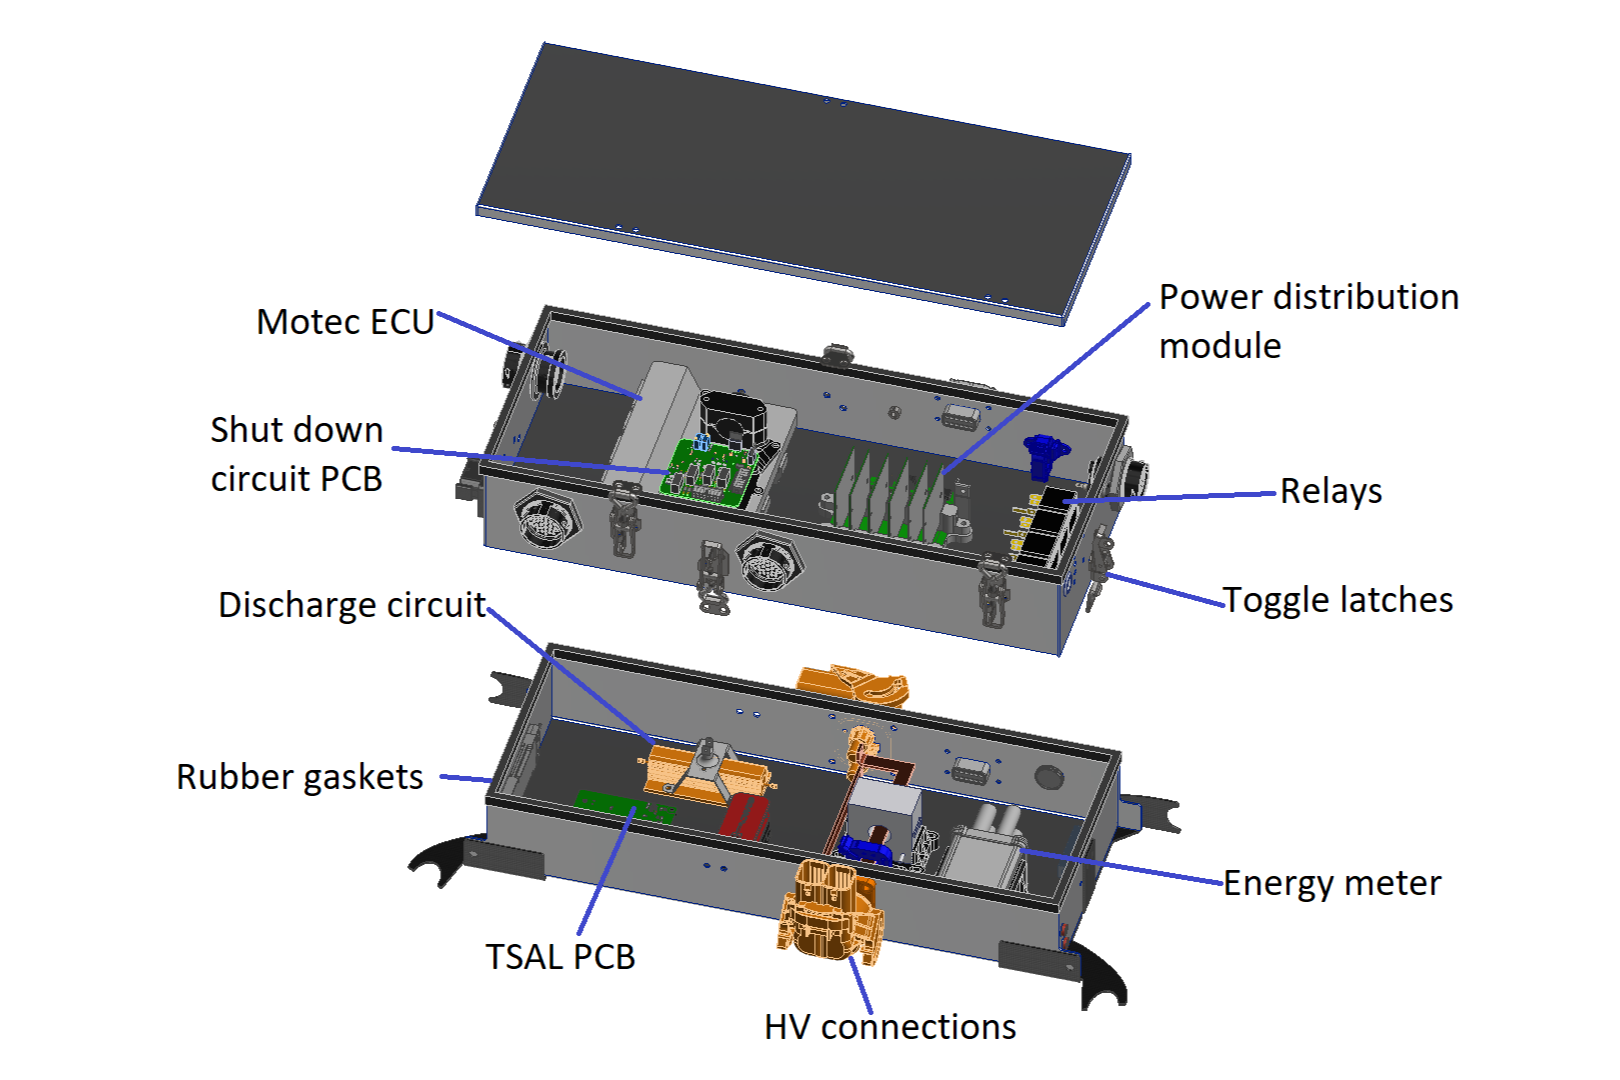
The housing was split into two parts to create electrical isolation between the HV and LV circuitry. In the LV top half we used a Motec engine control unit to control torque requests and manage the car data. The shutdown PCB monitored for connection between the HV circuits and LV ground (which would indicate a short of the HV battery) and the PCB disconnected the HV battery if it shorted. We used a power distribution module to separately fuse and switch the LV power supply to various components. Several circle connectors allowed the control PCBs to connect to the car’s loom.
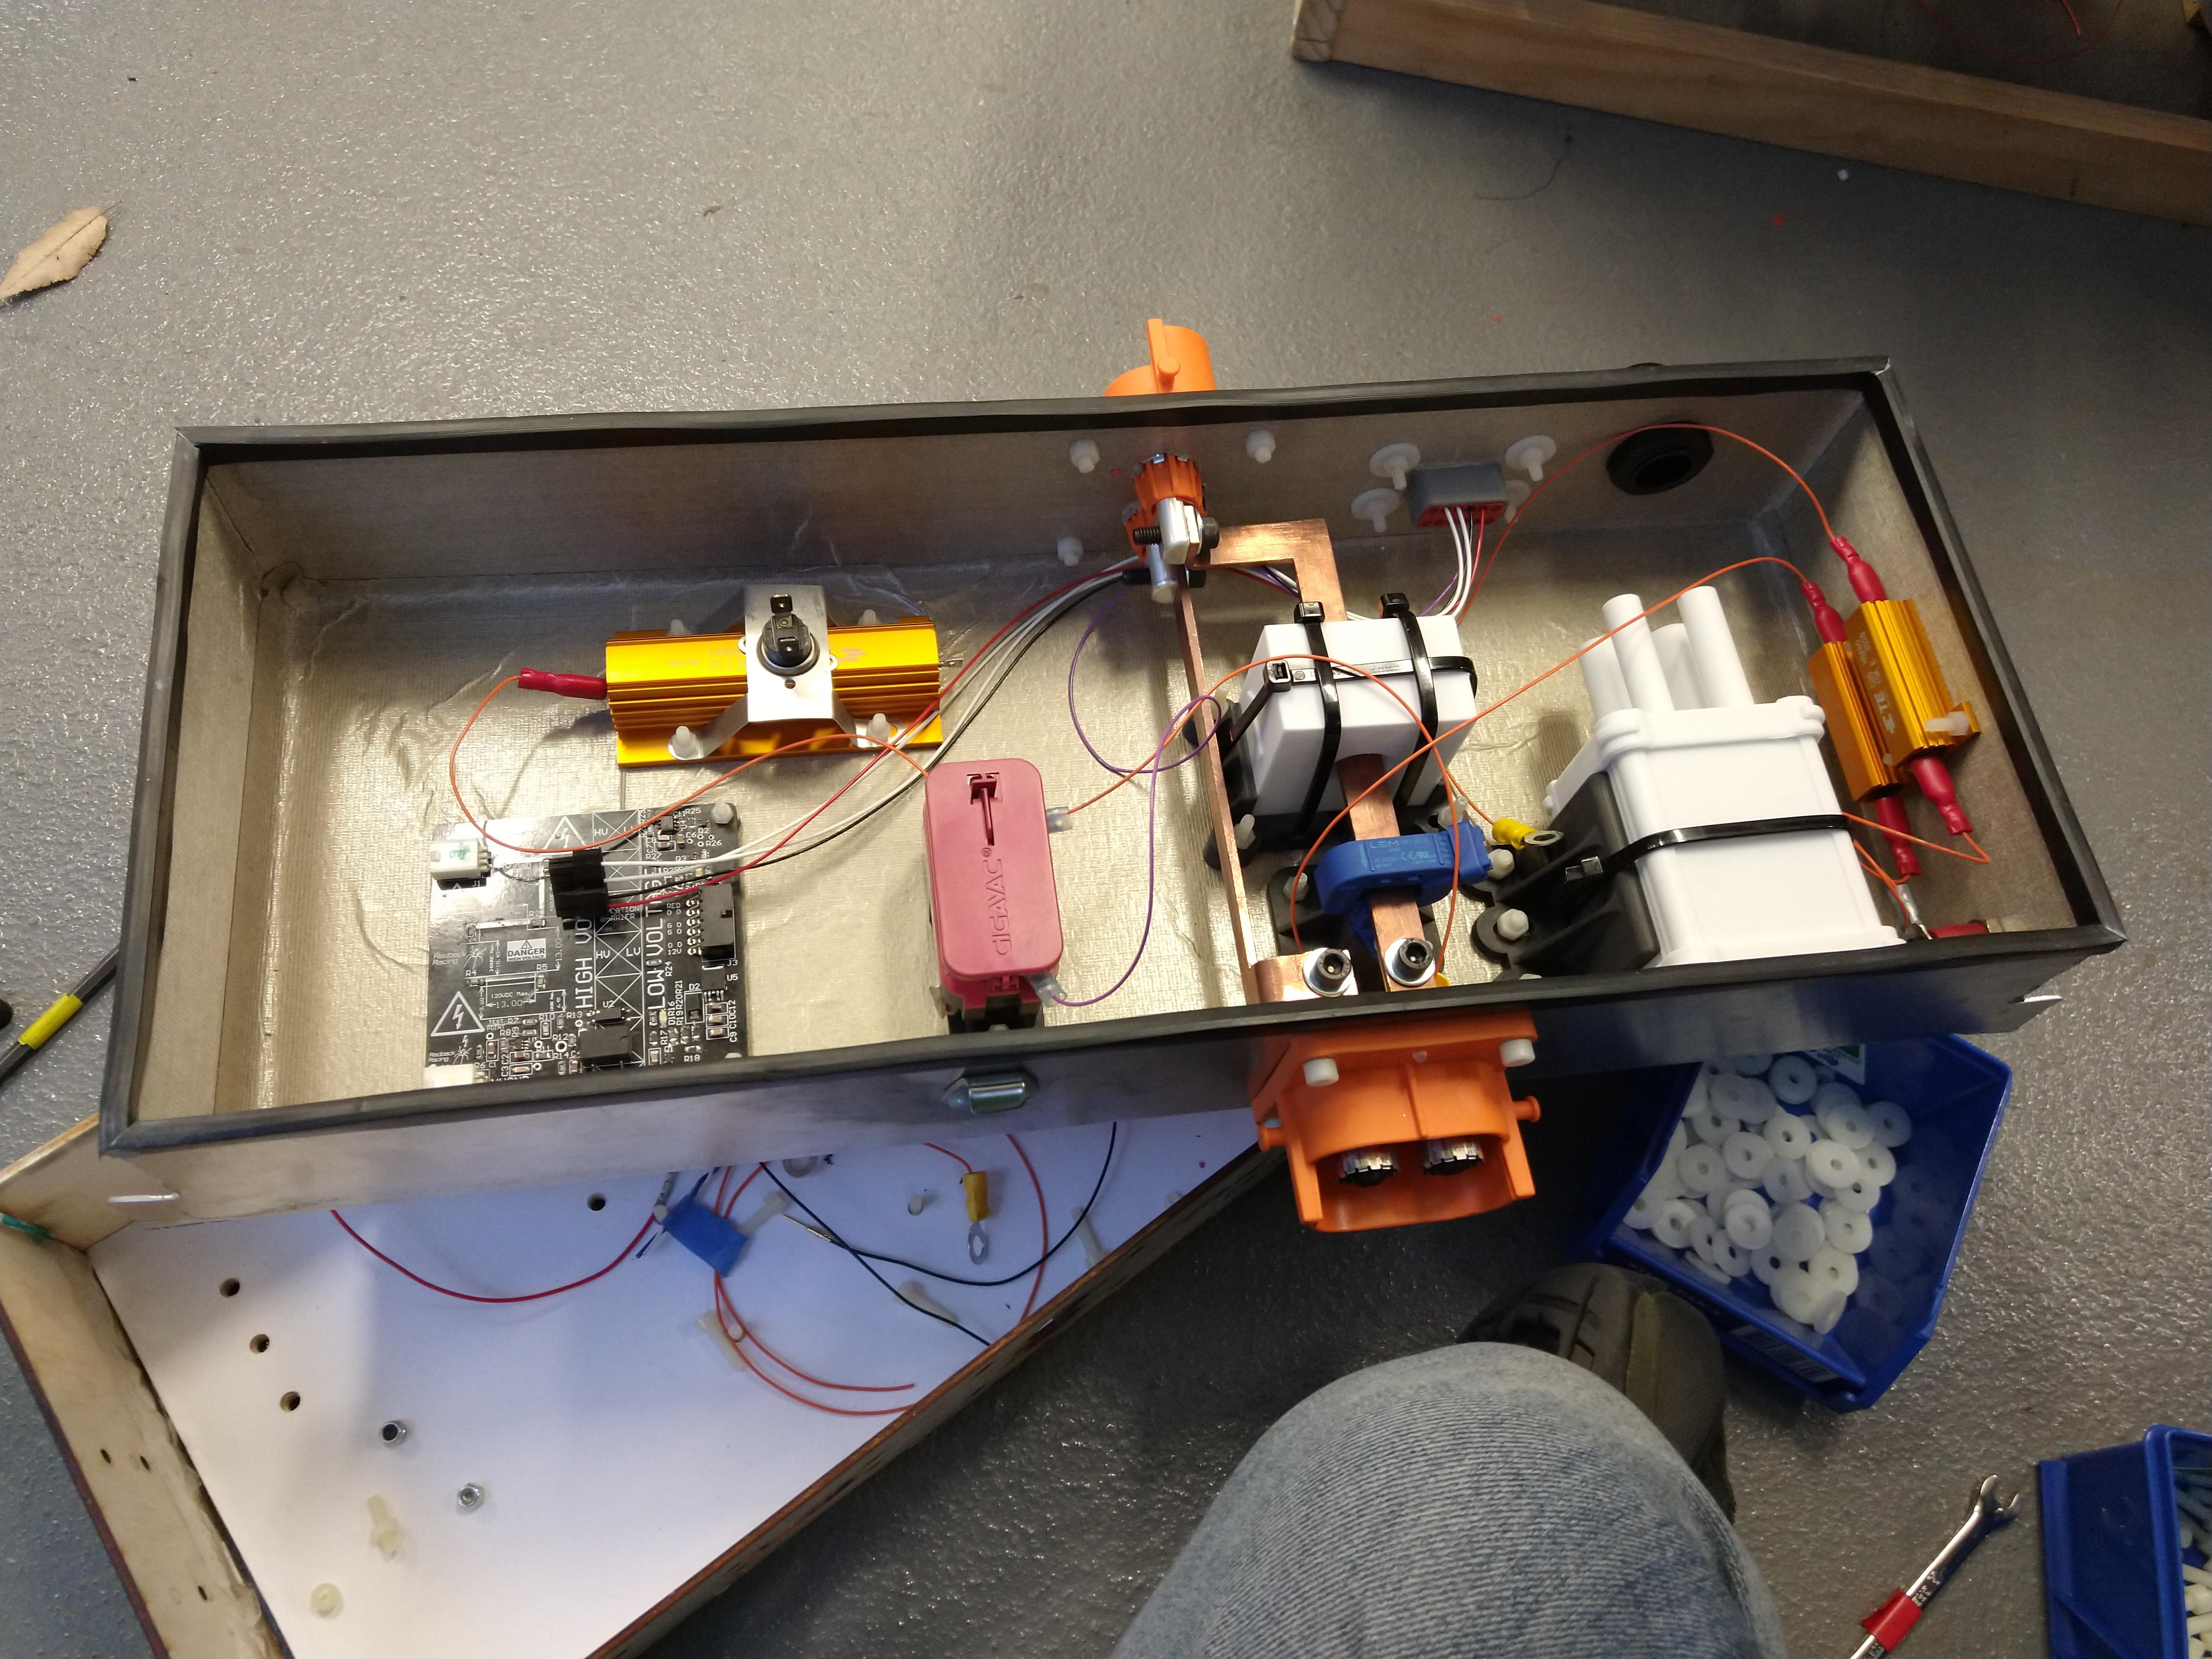
In the HV box, power lines passed through the electrical enclosure between the battery and the motor so that serval safety and monitoring devices could be fitted. It also contained a discharge circuit to discharge stored capacitance from the motor when the car got switched off.
During my second year we remade the electrical enclosure with a focus on lightweight and compact design. We changed from using welding aluminum panels to a fiberglass foam composite, which greatly reduced the enclosure weight.
Manufacturing
My first ever 5-axis part was this steel mount for the HV battery. They are a great example of a 5-axis part because they required three setups on a 3-axis machine but only two on the 5-axis. They could also be machined from both sides, which means I could use shorter and more rigid tools on the 5-axis. They were welded to the chassis and used to bolt the HV battery to the spaceframe.
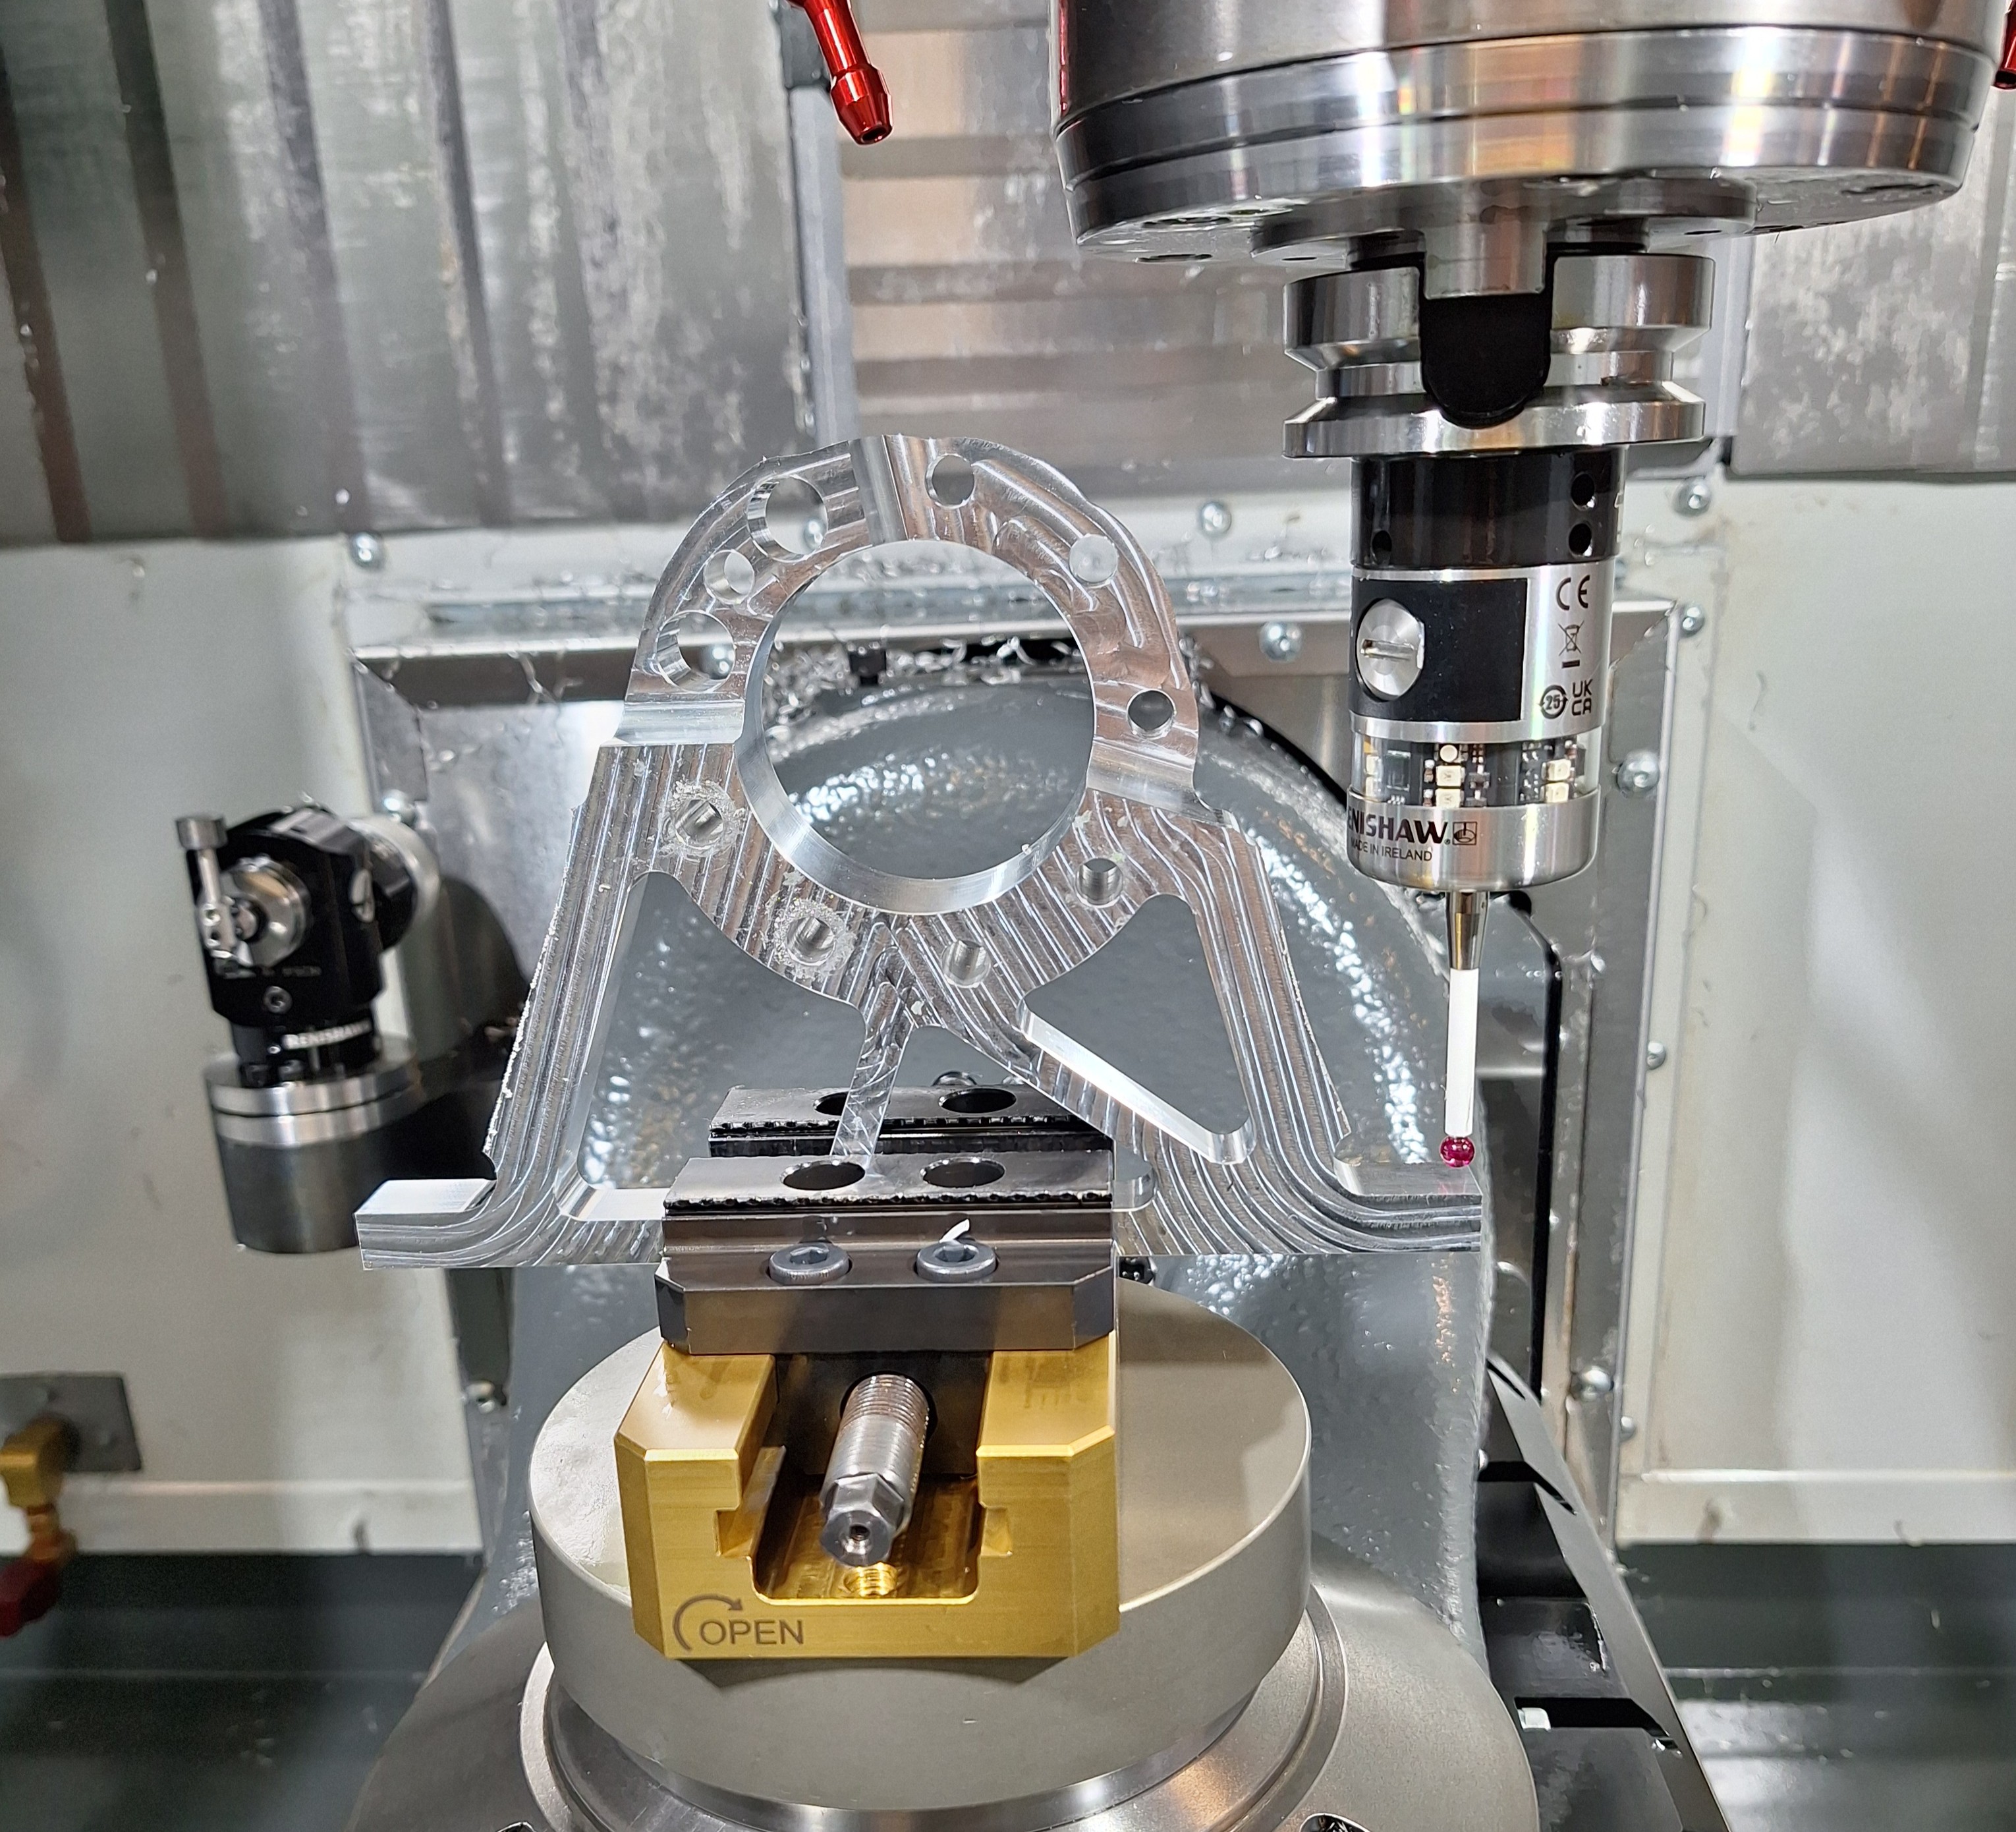
I also made the motor mount. This required several setups: two operations on a 3-axis Datron to do the front and back, then another operation on the 5-axis to drill some perpendicular holes. The 5-axis operation required careful alignment to ensure the part was orientated in X and Z correctly.
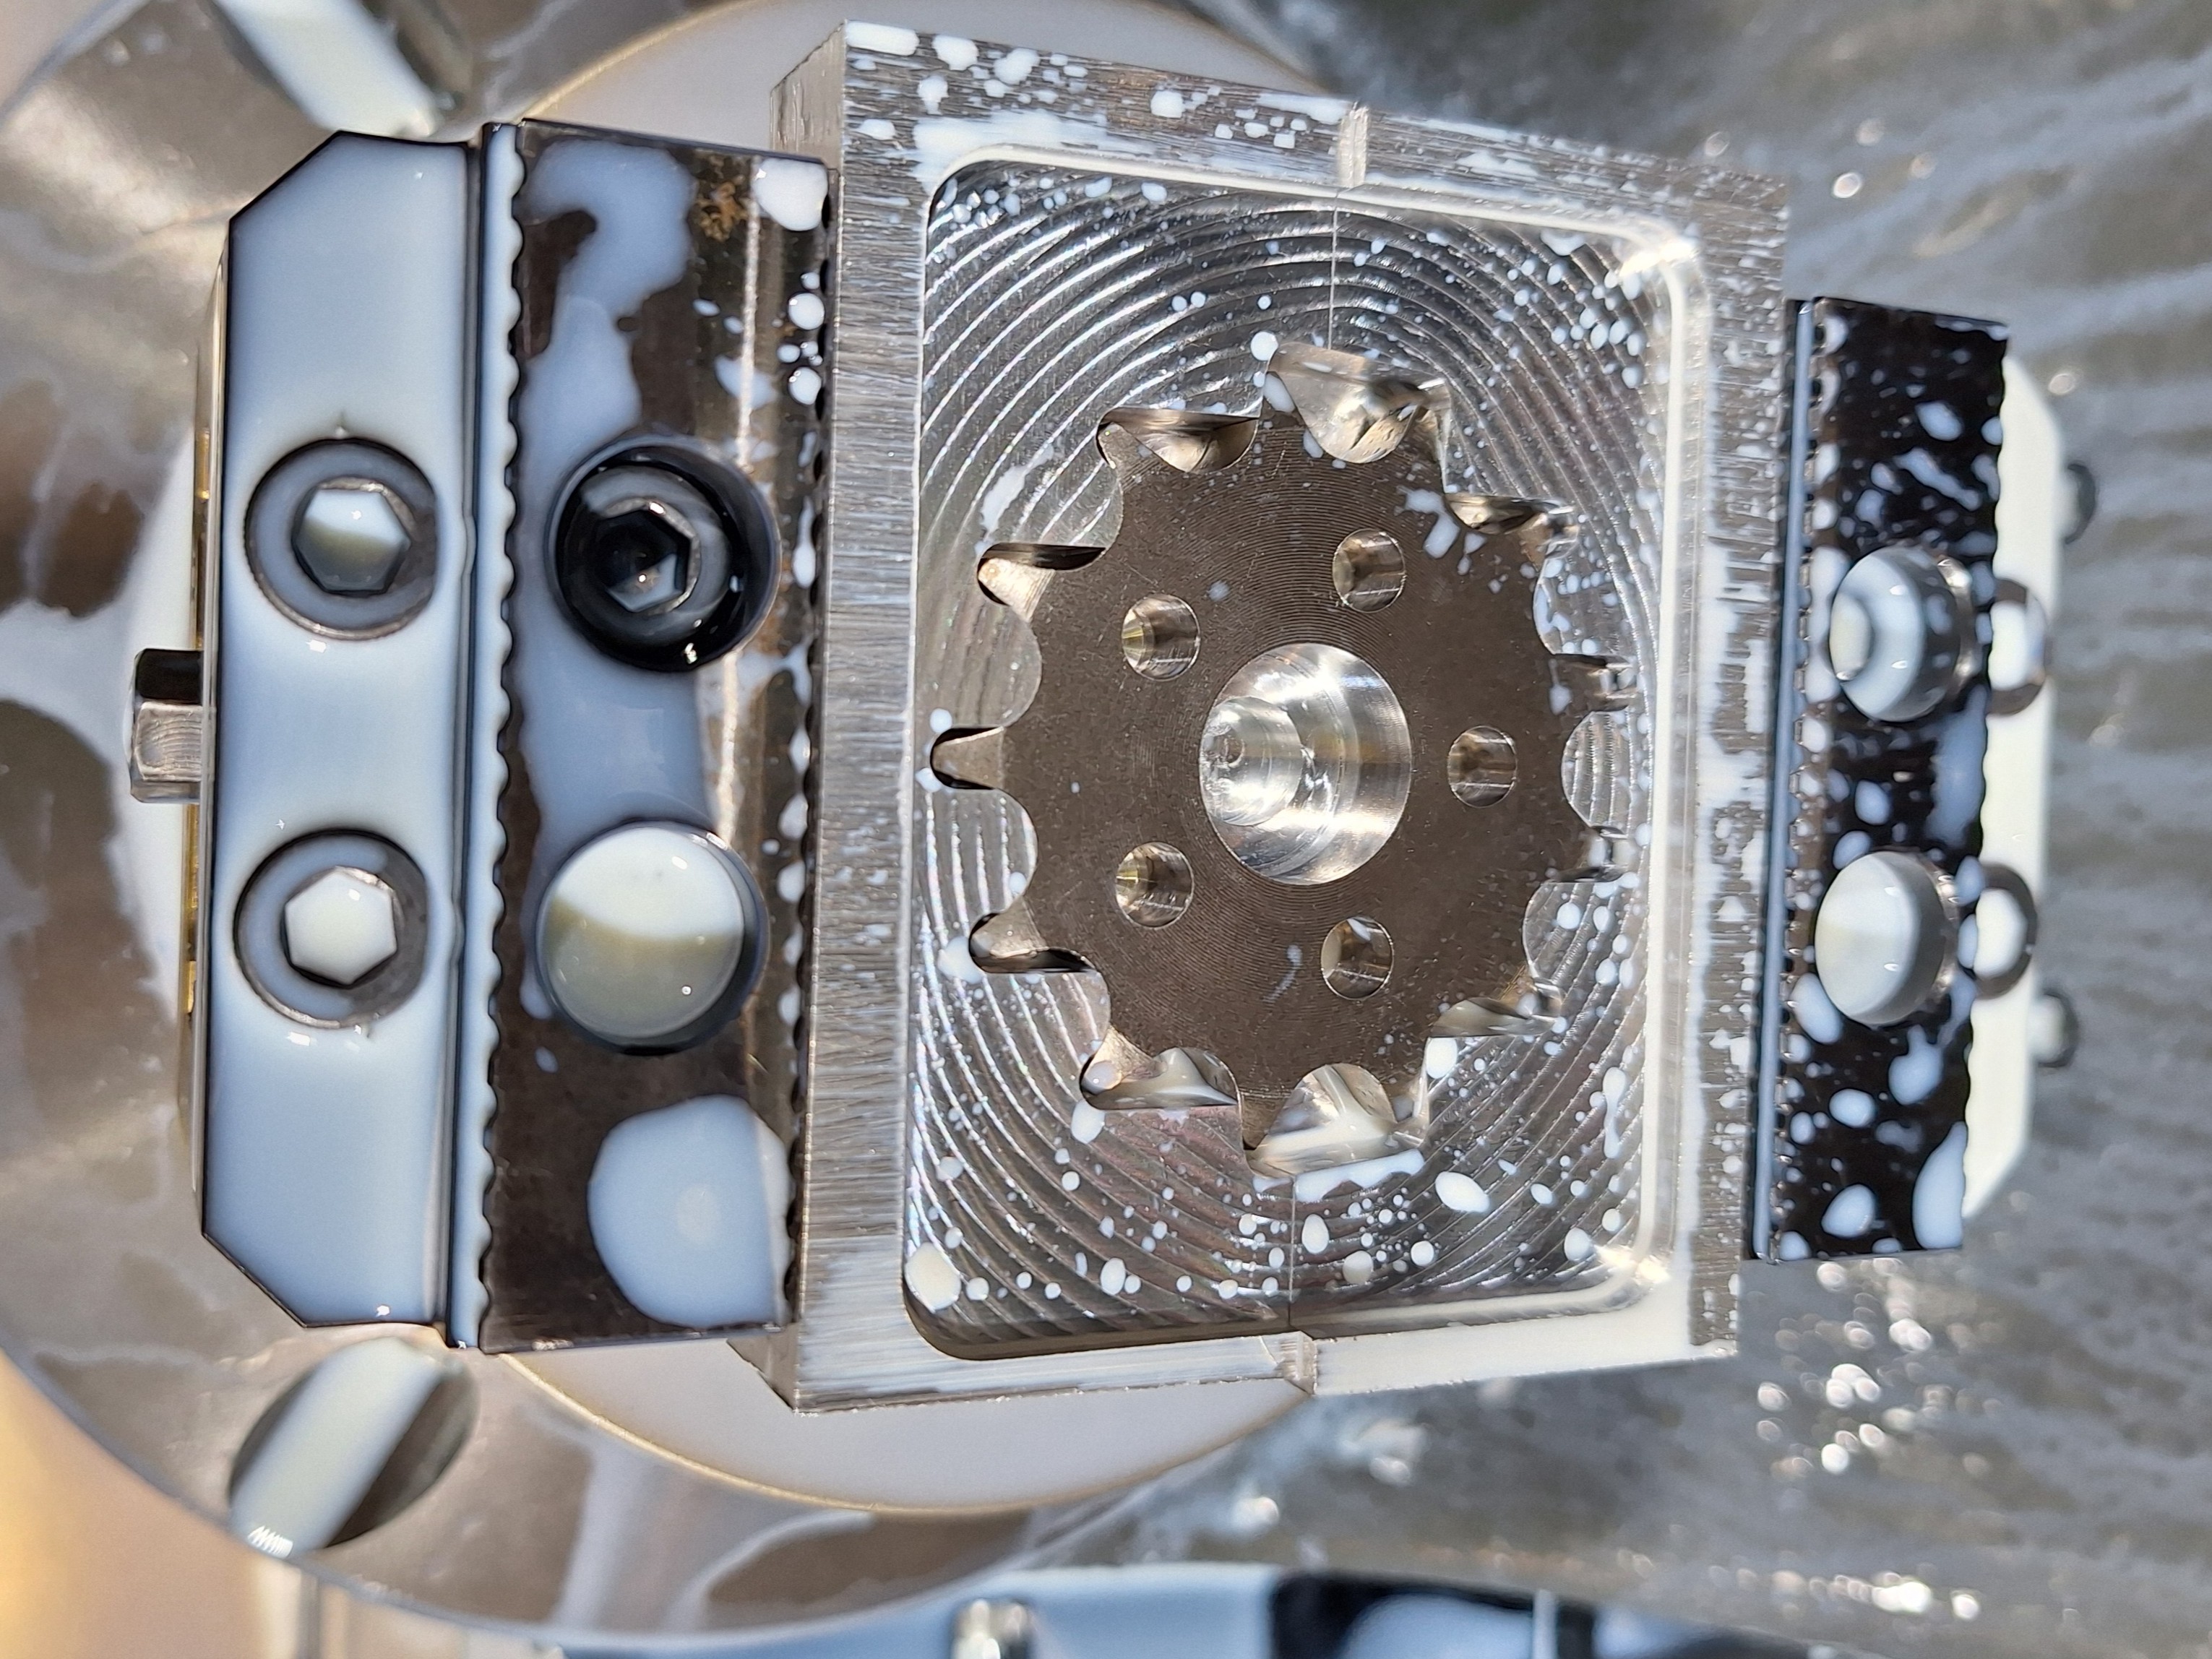
We had to add a custom bolt pattern to the sprockets we bought. As the sprocket was already cut, I had to design and make aluminium soft jaws to clamp onto the outside without damaging it. The actual pattern was simple, just 5 holes, but it was my first time machining hardened steel and using a carbide drill.
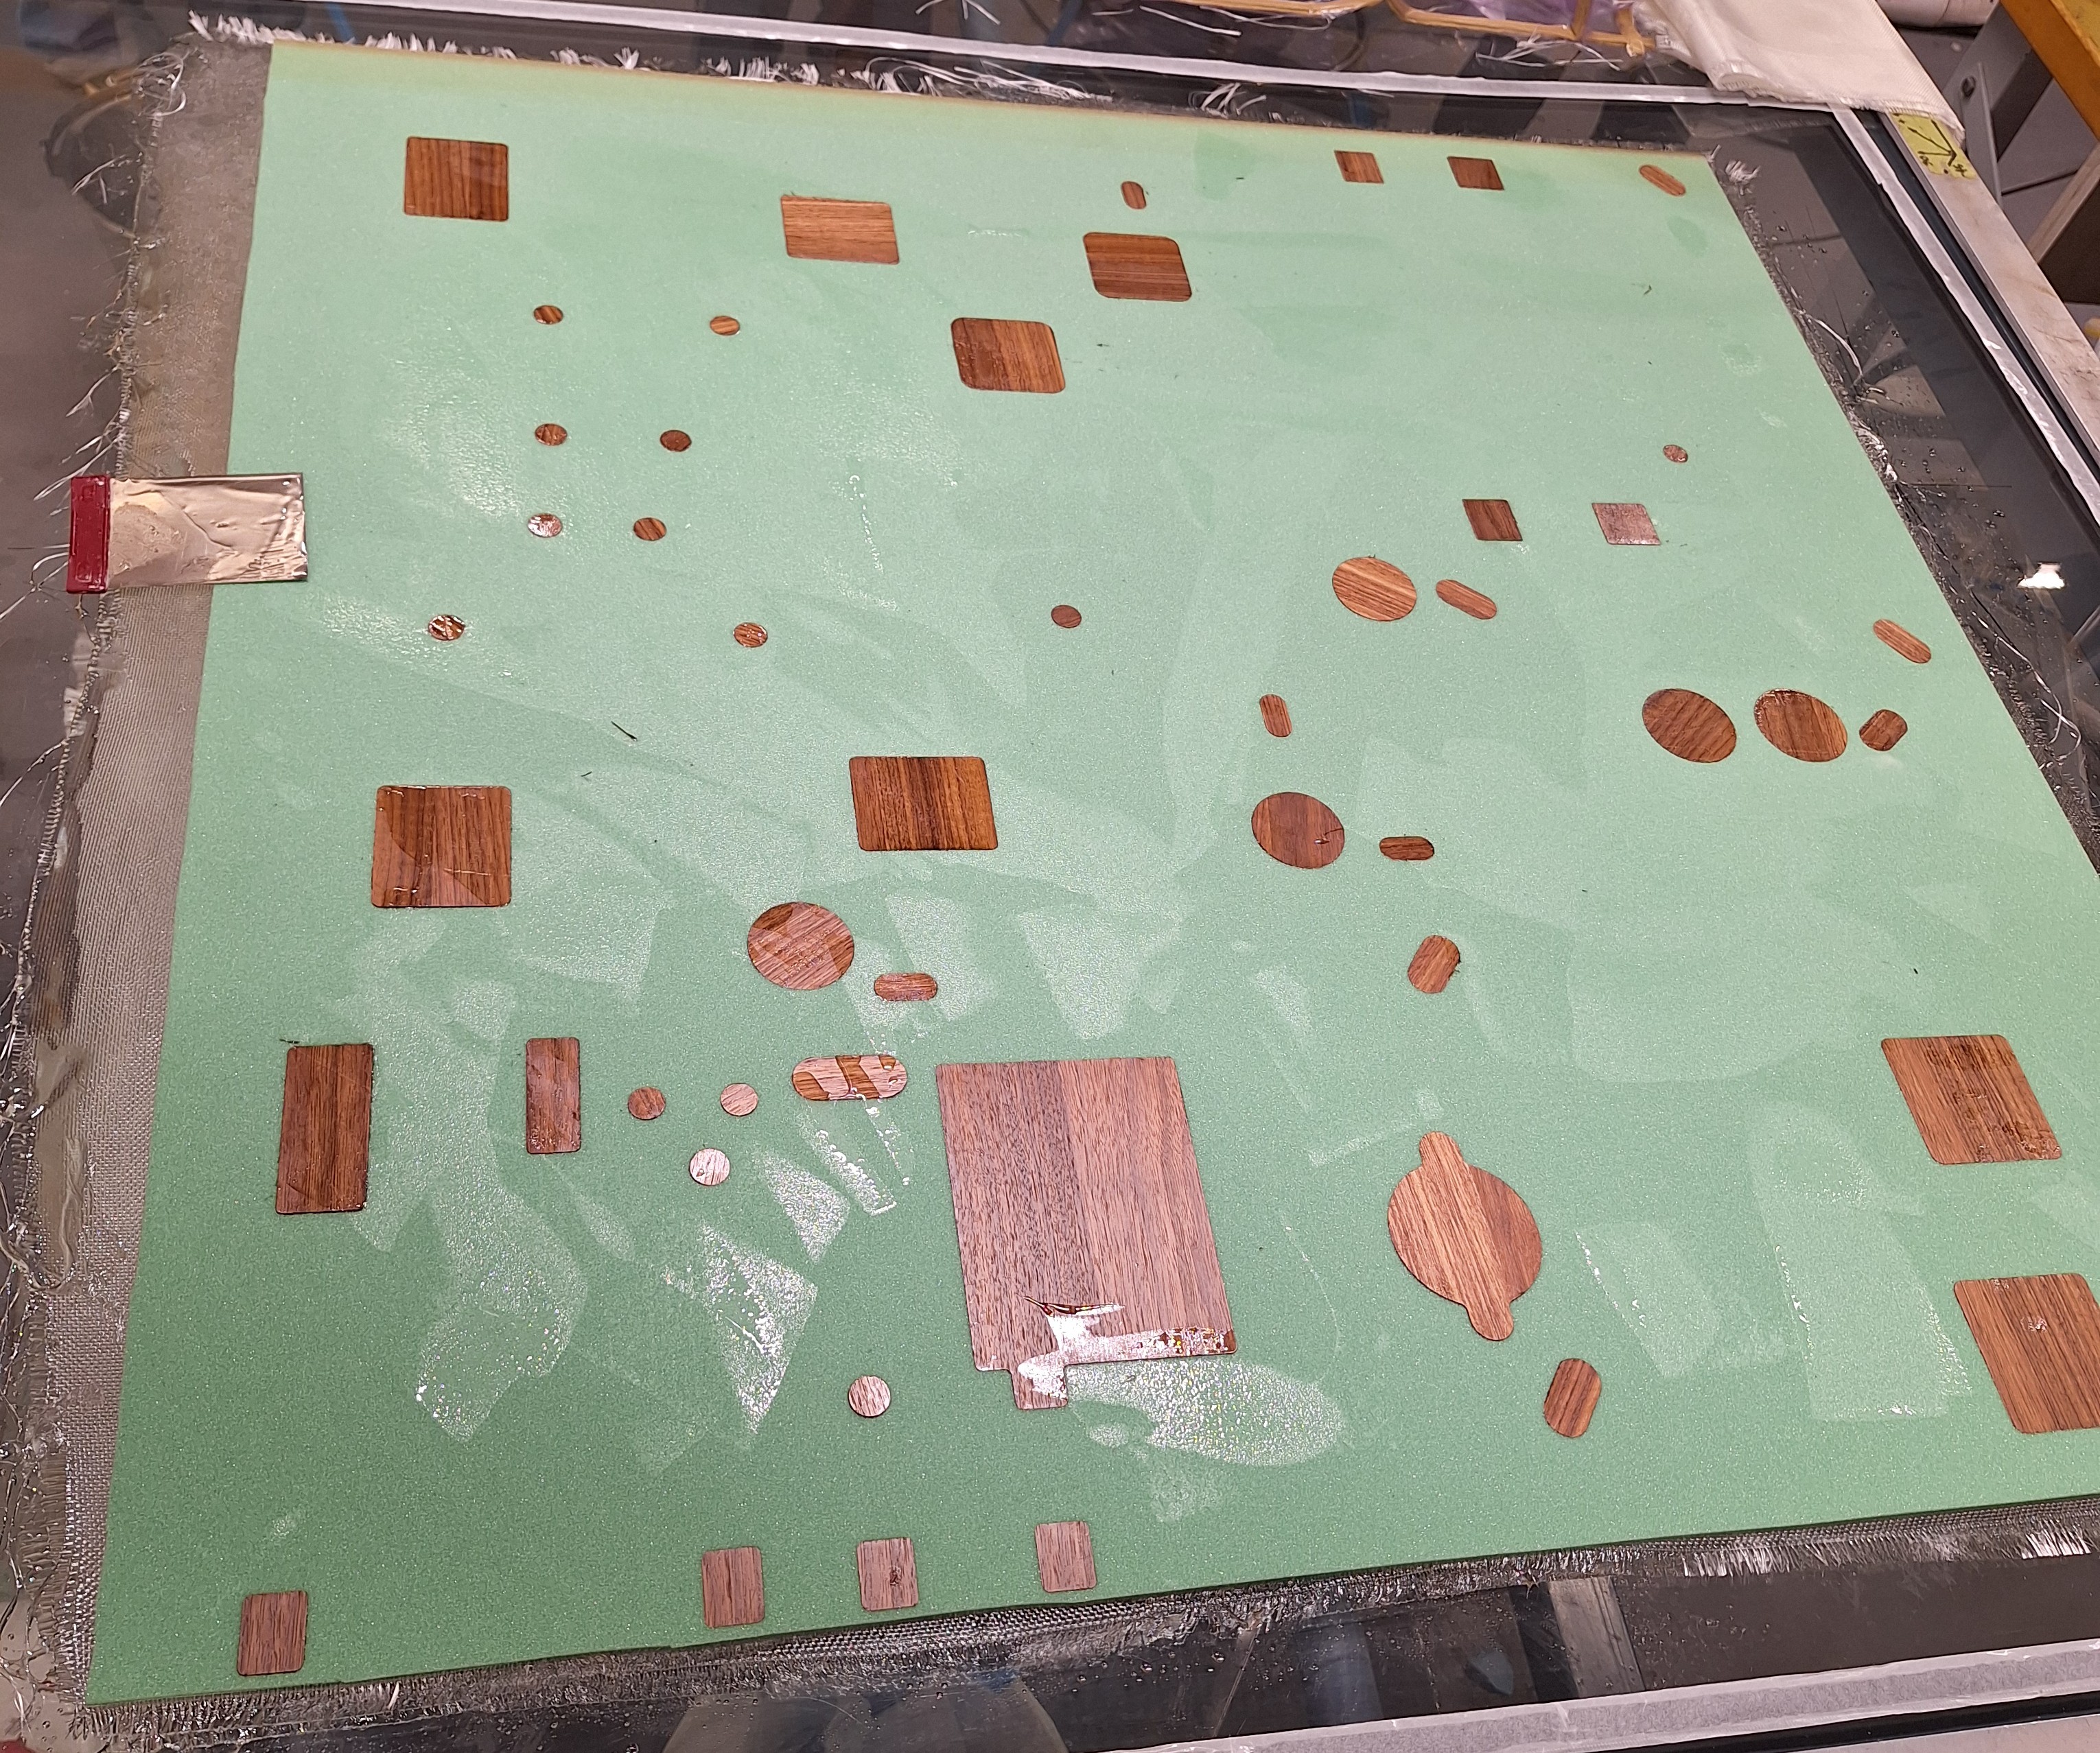
We did custom composite layups to make the panelling for some enclosures. We made a fiberglass-foam-fiberglass sandwich, with wooden hardpoints cut and glued into the foam where we needed to mount components.
Most of our sheet metal components were laser cut and bent. Laser cutting allowed for much more complex shapes and made it easy to create bending relief.
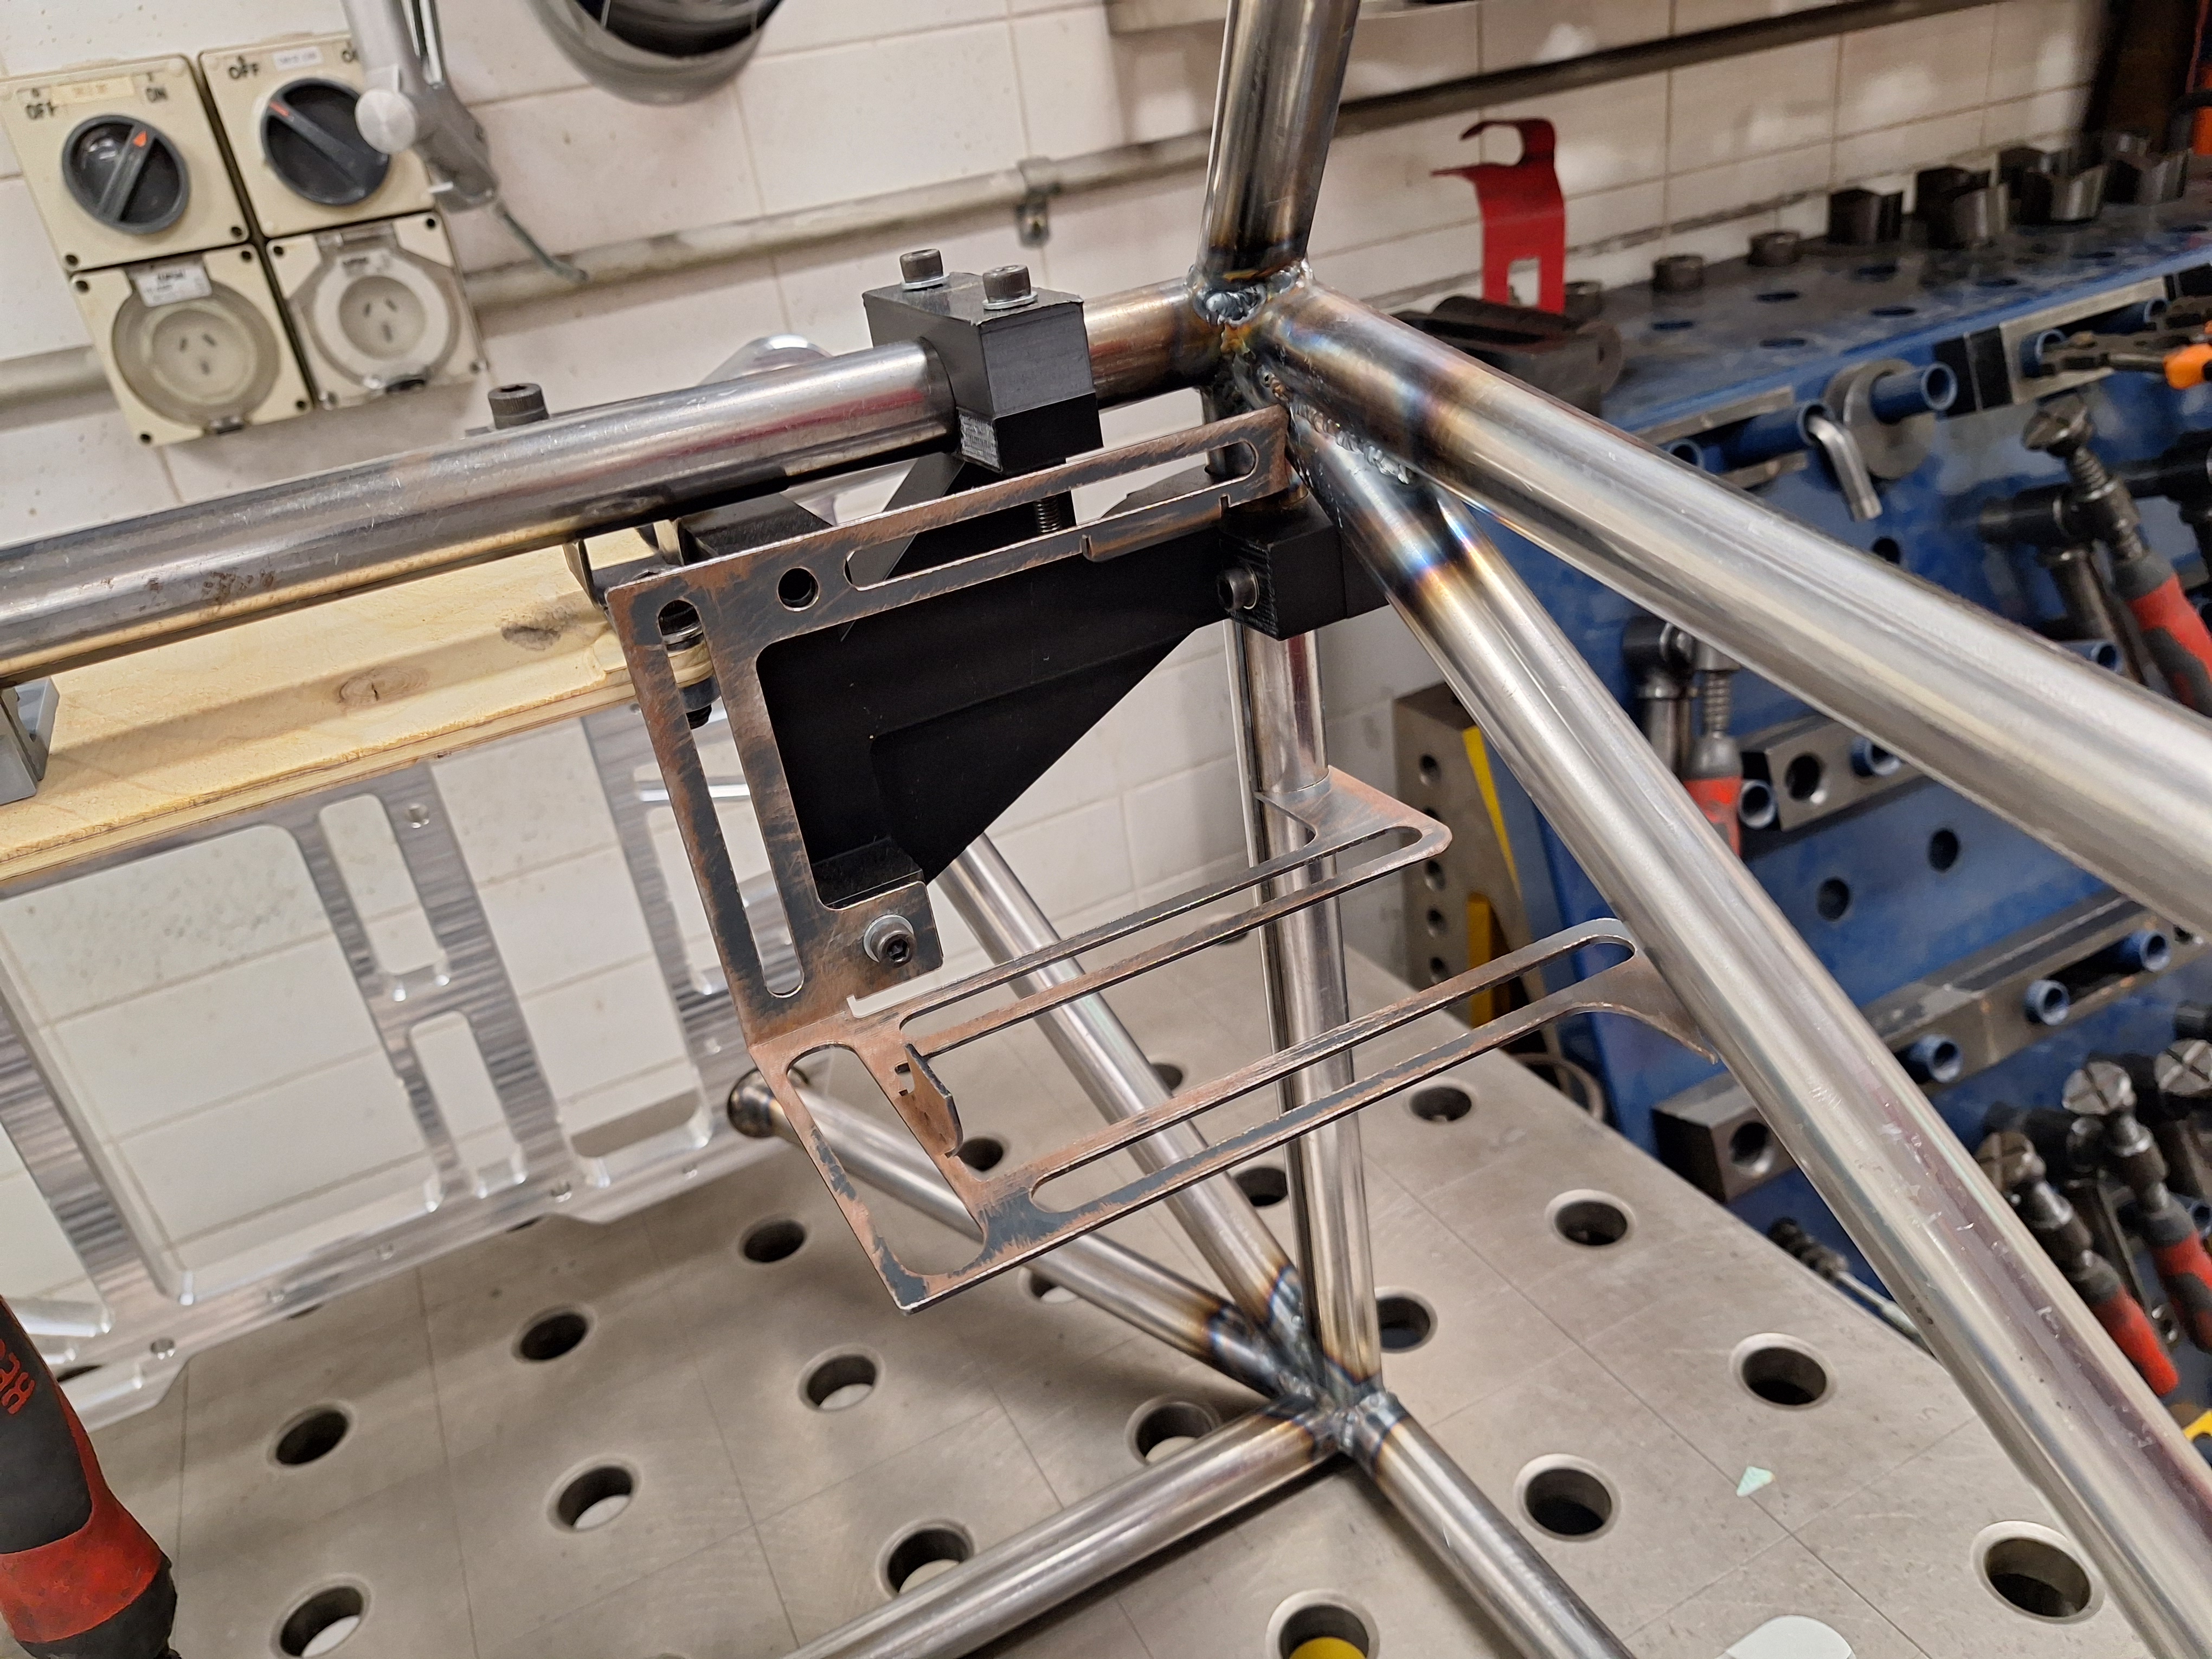
The hardest sheet metal parts to design and make were chassis mounts because the chassis tubes were at weird angles that required careful jigging and alignment for welding.